Introduction

After hanging the drywall, insulation must be installed in the ceiling to guarantee your home is comfortable and energy-efficient. Proper insulation helps with temperature control, energy efficiency, and noise reduction. After the drywall is up, you need to place insulation in the ceiling. This article will walk you through the process and provide the knowledge and instructions needed to do it correctly.
Insulating your ceiling is essential for preserving a cozy indoor atmosphere while lowering energy expenditures. After installing the drywall, you may ensure the best thermal efficiency and noise reduction by installing insulation.
Understanding the Importance of Ceiling Insulation
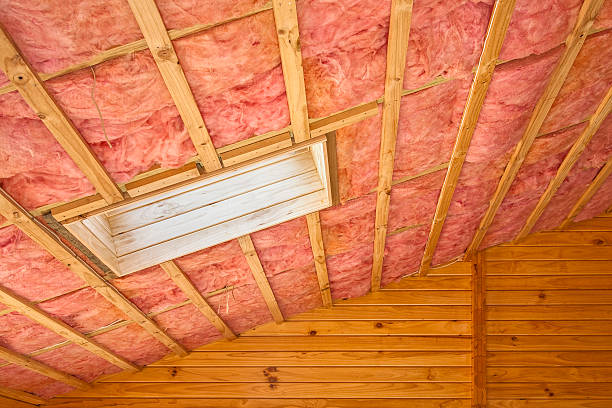
Insulation in the ceiling aids in forming a barrier that stops the movement of heat from the living area to the attic or roof. It functions as a thermal insulator, minimizing heat absorption during hotter seasons and lowering heat loss during cooler months to maintain the appropriate indoor temperature. By absorbing and reducing sound waves, insulation also aids in soundproofing.
Preparing for the Installation
Preparing the area is crucial in ensuring the ceiling insulation installation goes smoothly and successfully. It requires several important procedures that must be finished before starting the installation. The steps of the preparation procedure are explained in detail below:
· Clearing the Workspace
Removing all clutter and barriers from the work area before installing insulation is imperative. Remove any furniture, fixtures, or other anything that is blocking your access to the ceiling. Cleaning up the environment will give you a safe and orderly workspace.
· Inspecting the Drywall
Spend some time searching for any evidence of drywall damage or defects in the ceiling. Look for any cracks, holes, or water damage that may need to be repaired before putting the insulation. A stable and sturdy drywall surface is needed to ensure the insulation’s efficacy.
· Removing Existing Insulation (if necessary)
If any current insulation in the ceiling needs to be replaced or removed, do so now. Remove insulation that is damaged, outdated, or not working as you would want to see it too. Follow safe handling procedures while disposing of the old insulation.
· Checking for Structural Issues
Check the ceiling structure for problems that might interfere with the installation procedure. Check for any indications of joist damage, sagging, or other structural issues. To maintain the integrity of the ceiling, fixing these problems before moving further with the insulation installation is crucial.
· Ensuring Proper Ventilation
Proper ventilation is essential for your home’s general health. Verify the ceiling for any vents or openings that insulation shouldn’t protect. Moisture buildup and subsequent mold growth in the ceiling can be avoided with adequate ventilation.
· Planning the Installation Process
Before you begin putting the insulation, organizing the installation procedure is beneficial. To ensure a systematic approach, decide the order in which you’ll work on the various regions of the ceiling. If you plan, you may work more productively and be less likely to make mistakes or oversights.
Choosing the Right Insulation Material

To achieve peak performance and energy efficiency, choosing the appropriate insulation material for your ceiling is essential. When making this choice, there are many things to take into mind. To assist you in selecting the most appropriate insulation material, the following is a full description of each factor:
R-Value
An insulation’s R-value gauges how thermally resistant it is. It shows how well the insulation material can block the flow of heat. The performance of the insulation improves with increasing R-value. Consider the climate zone and your area’s construction regulations to establish the suggested R-value for your ceiling insulation.
Insulation Types
Various insulation materials are available, each with unique properties and benefits. Here are a few typical choices:
· Fiberglass Batts/Rolls
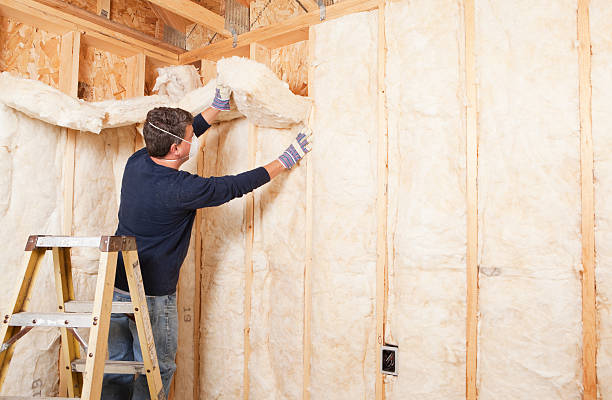
Made of small glass fibers, fiberglass insulation is available in batts or rolls. It has a strong thermal performance, is inexpensive, and is simple to install. Additionally beneficial for soundproofing is fiberglass insulation.
· Cellulose Insulation
Cellulose insulation is created from fire-retardant-treated recycled paper. It is environmentally friendly and has good thermal and acoustic insulation qualities. Insulation made of cellulose is frequently blown into the ceiling voids.
· Spray Foam Insulation
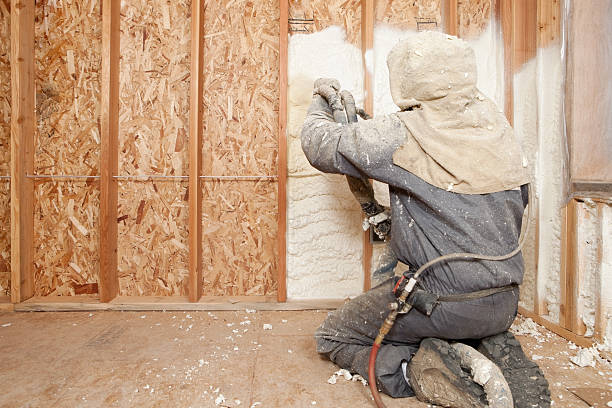
Spray foam insulation is a flexible substance that expands upon application, filling cracks and creating a superior airtight seal. It significantly inhibits air leakage and has a high R-value. For spray foam insulation, a professional installation is advised.
· Mineral Wool Insulation
Mineral wool insulation is created from naturally occurring rock or slag fibers. It offers good thermal and sound insulation and has excellent fire resistance qualities. There are two types of mineral wool insulation: batts and loose-fill.
Suitability for Ceiling Applications
Make sure the insulation material you select is appropriate for usage on ceilings. Because of how they are applied, some materials, like spray foam insulation, could need professional installation. Think about how simple the installation will be and whether it will work with your ceiling design.
Moisture Resistance
Insulation might become less effective and suffer damage from moisture. If your ceiling is prone to moisture problems, use an insulating material with strong, moisture-resistant qualities. By doing this, you can stop mold from growing and keep the insulation’s effectiveness over time.
Cost & Budget
Consider the insulating material’s price and how well it fits your budget. Although the initial cost is a concern, consider the potential benefits and long-term energy savings the insulation material can offer. Cost should be weighed against desired longevity and performance.
Safety Precautions

Prioritizing safety is essential while working with insulating materials. To prevent skin rashes and respiratory problems, wear gloves, safety glasses, and a dust mask. Take regular pauses, and keep the workspace properly ventilated.
Tools & Materials Required
Assemble the tools and materials listed below before installing insulation in the ceiling after drywall:
- Insulation material of choice
- Measuring tape
- Utility knife
- Straightedge or ruler
- Staple gun or adhesive
- Dust mask
- Safety goggles
- Work gloves
- Step ladder
Step-by-Step Guide to Installing Insulation in the Ceiling
Guidelines for installing insulation in the ceiling are listed below:

· Assess the Existing Ceiling
Look at the ceiling to see any potential problems, such as water damage or structural issues. Make sure the drywall is straight, firmly fastened, and defect-free.
· Calculate the Required Insulation Amount
Measure the space that needs insulation while accounting for the distance between joists and any obstacles like piping or electrical wire. Based on the intended R-value and the insulation material’s coverage area, determine the required amount of insulation.
· Gather the Necessary Tools & Materials
Assemble all of the installation-related tools and materials. Make sure you have everything you require to avoid installation delays.
· Put on Protective Gear
Wear safety-first protective equipment, such as gloves, safety goggles, and a dust mask. Your workplace will be safer as a result, and you will be shielded from any irritants.
· Mark the Joists & Measure the Insulation
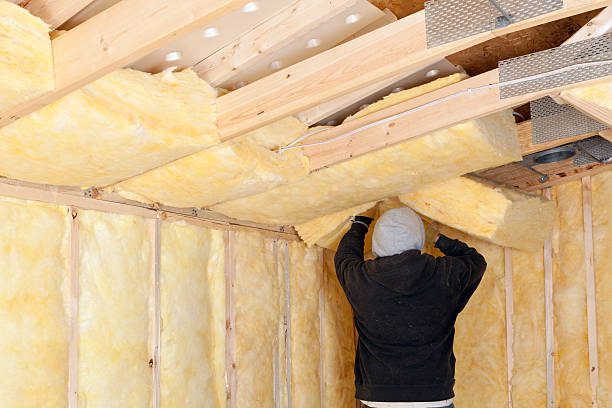
Using a utility knife and straightedge, gently cut the insulation to the desired length. Press the insulation firmly into the space between the joists, making sure there are no gaps or compressions.
· Cut & Install the Insulation
Examine the installed insulation for any cracks or air leaks. Caulk or foam insulation should be applied to seal these areas to reduce energy usage and stop air infiltration.
· Seal Any Gaps or Air Leaks
To complete installing insulation in the remaining ceiling spaces, continue the procedures mentioned above. Make sure the installation is thorough and effective by taking your time.
· Repeat the Process for Each Ceiling Section
The above processes should be followed to finish placing insulation in the remaining ceiling areas. Spend some time making sure the installation is complete and efficient.
Additional Tips for Effective Installation
- Follow a systematic, section-by-section approach to preserve accuracy and consistency.
- Keep the insulation material from being compressed since this could lessen its efficiency.
- If you experience complicated structural problems or have questions about the installation procedure, consider employing an expert.
Conclusion
A vital step in establishing a cozy and energy-efficient living environment is to install insulation in the ceiling once drywall has been installed. You can successfully insulate your ceiling, enhancing thermal performance and lowering energy use, by following the instructions and taking the required measures.

Leave a Reply
Want to join the discussion?Feel free to contribute!